<div id="content"> <div id="container"> <div id="featured"> </div> <div id="paragraphs"> </div> </div> </div>

如何把PSD網頁切圖制作HTML全過程剖析
今天的這個教程,教大家如何把psd頁面利用div+css切割成html頁面
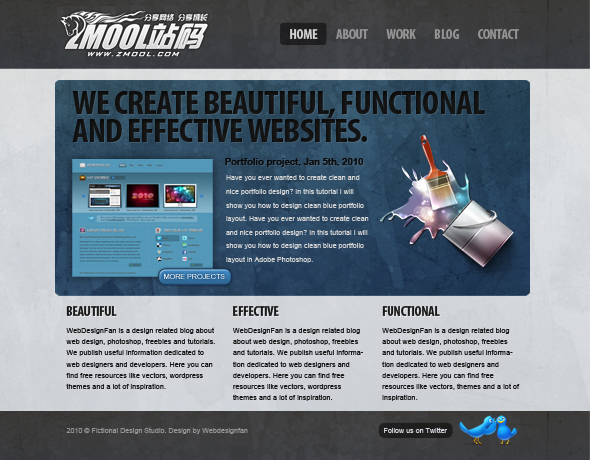
首先看看效果
下面的圖片就是效果圖,切割出來后,可能頭部和底部會寬點.....
新建文件夾
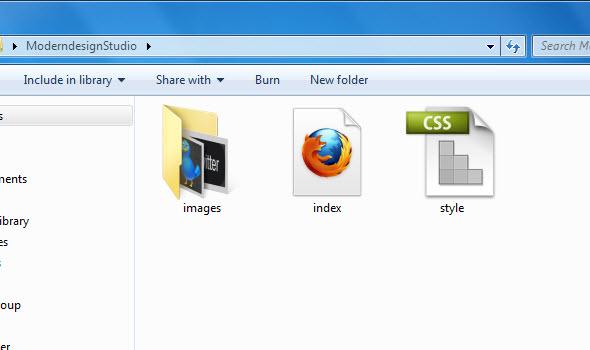
開 始時,在您的計算機中創建一個文件夾。我把它命名為zmool。再在文件夾中創建新文件夾images,放網站的所有圖像。接下來打開代碼編輯器 (Dreamweaver),并在根目錄下創建一個HTML文件名為index.html,這是我們的主頁模板。現在創建一個新的CSS文件,并將其命名 為style.css文件。如下圖:
打開index.html文件。在head標簽頂部,添加鏈接到您的樣式表(style.css)。你可以使用下面的代碼。
<link href="style.css" rel="stylesheet" type="text/css" />
頭部的代碼如下面:
<!DOCTYPE html PUBLIC "-//W3C//DTD XHTML 1.0 Transitional//EN" "http://www.w3.org/TR/xhtml1/DTD/xhtml1-transitional.dtd">
<html xmlns="http://www.w3.org/1999/xhtml">
<head>
<meta http-equiv="Content-Type" content="text/html; charset=utf-8" />
<title>Modern Design Studio</title>
<link href="style.css" rel="stylesheet" type="text/css" />
</head>
<body>

</body>
</html>
建立HTML結構
現在,我們將設置HTML文件結構。設置3個部分(標題,內容,頁腳)像下面一樣:
<!DOCTYPE html PUBLIC "-//W3C//DTD XHTML 1.0 Transitional//EN" "http://www.w3.org/TR/xhtml1/DTD/xhtml1-transitional.dtd">
<html xmlns="http://www.w3.org/1999/xhtml">
<head>
<meta http-equiv="Content-Type" content="text/html; charset=utf-8" />
<title>Untitled Document</title>
<link rel="stylesheet" type="text/css" href="style.css" />
</head>
<body>
<div id="header">

</div>
<div id="content">

</div>
<div id="footer">

</div>
</body>
</html>
切割背景
我們的PSD文件包含了很多紋理效果,我們要把這些全部切出來,然后,用代碼添加到網頁上面,使div頁面效果和設計的效果達到一致。
<body>
<div id="header">
  <div id="container">

  </div>
</div>
<div id="content">
  <div id="container">

  </div>
</div>
<div id="footer">
  <div id="container">

  </div>
</div>
</body>
現在在photoshop里面打開原先設計好的, 隱藏所以的圖層,除背景層外.
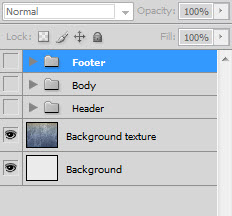
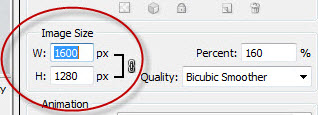
現在采取的切片工具,選擇背景,保存網頁web格式按(ALT +shift+Ctrl + S)。然后保存的圖像文件夾文件名為background.jpg。
設置背景樣式
打開style.css文件,設置基本樣式,還有背景樣以及主體部分的寬度,如下代碼:
* {
   margin: 0px;
   padding: 0px;
}
body
{
   background:url(images/background.jpg);
}
#container
{
   margin: auto;
   width: 960px;
}
切割頭部
返回photoshop,隱藏所以圖層,除頭部背景外,并用同樣的方法,把頭部背景圖片切割保存為web格式,保存文件名為head.jpg。
編輯頭部背景代碼
在style.css文件里編輯如下代碼:
#header
{
	background:url(images/header.jpg);
	height:124px;
}
切割頭部logo
在這時,切割logo層,隱藏所有圖層,包括背景層,如上同樣方法切割logo層保存為logo.png,注意:保存為png格式圖片
添加在頁面添加logo
現在返回到html中,在#header #container內,添加下面的代碼
<div id="header">
   <div id="container">
      <div id="logo"><a href="#"><img src="images/logo.png" class="logo"></a></div>
   </div>
</div>
現在, 下面切換到style.css文件,編寫#logo樣式.
#logo
{
	margin-top:20px;
	border:none;
}
編輯導航代碼
下面是頁面里的代碼,頭部header包括logo和導航兩個部分.
<div id="header">
   <div id="container">
      <div id="logo"><a href="#"><img src="images/logo.png" class="logo"></a></div>
      <ul>
      <li><a href="#">Home</a></li>
      <li><a href="#">About</a></li>
      <li><a href="#">Work</a></li>
      <li><a href="#">Blog</a></li>
      <li><a href="#">Contact</a></li>
    </ul>
   </div>
</div>
導航樣式如下:
現在,添加css表里的導航樣式~,ul、li和鏈接a的樣式:
#header li
{
	color:#959595;
	list-style:none;
	float:left;
	margin-right:20px;
	font-family:"Myriad Pro",arial;
	font-weight:bold;
	font-size:24px;
}
#header li a
{
	color:#959595;
	text-decoration:none;
	padding:10px;
}
#header ul
{
	float:right;
	margin-top:-40px;
}
#header li a:hover
{
	background:#202020;
	color:#d2d2d2;
	-moz-border-radius:5px;
	-khtml-border-radius:5px;
	-webkit-border-radius:5px;
}
現在制作中間部分
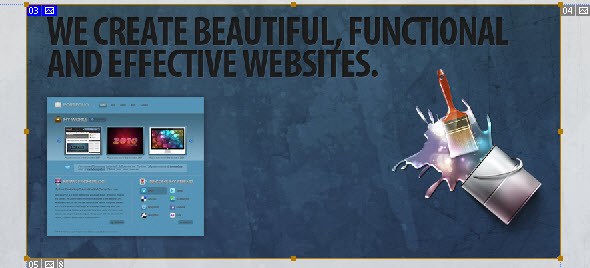
現在我們在頁面的中間部分content添加兩個div,如下圖:
切換到photoshop的psd頁面, 切下中間部分,取名為featured.jpg.如下圖:
在你的HTML頁面添加如下代碼, 和一些文字介紹:
<div id="content">
  <div id="container">
     <div id="featured">
       <a href="#">MORE PROJECTS</a>
       <p class="dummytext"><span>Portfolio project, Jan 5th, 2010</span> Have you
	   ever wanted to create clean and nice portfolio design? In this tutorial I
	   will show you how to design clean blue portfolio layout. Have you ever wanted
	   to create clean and nice portfolio design? In this tutorial I will show you how
	   to design clean blue portfolio layout in Adobe Photoshop.</p>
     </div>
     <div id="paragraphs">

     </div>
  </div>
</div>
在PSD文件里,隱藏其他所以圖層,只留下按鈕圖層部分,切下按鈕部分,保存png格式,命名為button.png.
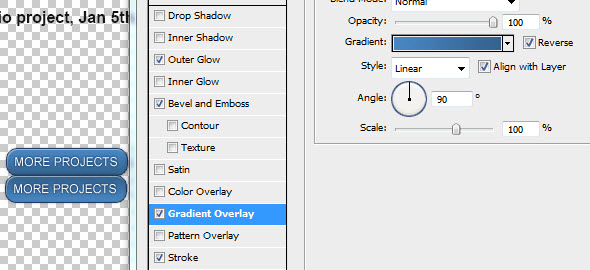
現在我們把這些圖片添加到頁面中去,切換到css文件頁面,添加如下代碼,這里包括背景樣式,和按鈕的樣式.
#featured
{
	background:url(images/featured.jpg) no-repeat;
	height:381px;
	margin-top:30px;
	margin-left:80px;
}
#featured a
{
	background:url(images/button.png);
	height:30px;
	width:124px;
	text-indent:-9999px;
	position:absolute;
	margin-top:330px;
	margin-left:180px;
}
#featured a:hover
{
	background-position:0px 30px;
}
現在我們添加些dummytext(文字介紹)的樣式:
.dummytext
{
	color:#d2d2d2;
	width:245px;
	margin-top:150px;
	position:absolute;
	font-family:Arial, Helvetica, sans-serif;
	font-size:12px;
	line-height:180%;
	margin-left:290px;
}
.dummytext span
{
	font-size:16px;
	color:#191919;
	font-weight:bold;
}
下面添加添加圖片展示下面的分類介紹部分
頁面的代碼部分如下.
<div id="paragraphs">
       <p class="paragraph">
         <span>BEAUTIFUL</span>WebDesignFan is a design related blog about web design, photoshop, freebies
         and tutorials. We publish useful information dedicated to web designers and developers. Here you can find free
         resources like vectors, wordpress themes and a lot of inspiration.
       </p>

       <p class="paragraph">
         <span>EFFECTIVE</span>WebDesignFan is a design related blog about web design, photoshop, freebies
         and tutorials. We publish useful information dedicated to web designers and developers. Here you can find free
         resources like vectors, wordpress themes and a lot of inspiration.
       </p>

       <p class="paragraph">
         <span>FUNCTIONAL</span>WebDesignFan is a design related blog about web design, photoshop, freebies
         and tutorials. We publish useful information dedicated to web designers and developers. Here you can find free
         resources like vectors, wordpress themes and a lot of inspiration.
       </p>
</div>
我們中間部分的內容,整體看起來應該是這樣的:
<div id="content">
  <div id="container">
     <div id="featured">
       <a href="#">MORE PROJECTS</a>
       <p class="dummytext"><span>Portfolio project, Jan 5th, 2010</span> Have you
	   ever wanted to create clean and nice portfolio design? In this tutorial I
	   will show you how to design clean blue portfolio layout. Have you ever wanted
	   to create clean and nice portfolio design? In this tutorial I will show you how
	   to design clean blue portfolio layout in Adobe Photoshop.</p>
     </div>
     <div id="paragraphs">
       <p class="paragraph">
         <span>BEAUTIFUL</span>WebDesignFan is a design related blog about web design, photoshop, freebies
         and tutorials. We publish useful information dedicated to web designers and developers. Here you can find free
         resources like vectors, wordpress themes and a lot of inspiration.
       </p>

       <p class="paragraph">
         <span>EFFECTIVE</span>WebDesignFan is a design related blog about web design, photoshop, freebies
         and tutorials. We publish useful information dedicated to web designers and developers. Here you can find free
         resources like vectors, wordpress themes and a lot of inspiration.
       </p>

       <p class="paragraph">
         <span>FUNCTIONAL</span>WebDesignFan is a design related blog about web design, photoshop, freebies
         and tutorials. We publish useful information dedicated to web designers and developers. Here you can find free
         resources like vectors, wordpress themes and a lot of inspiration.
       </p>
     </div>
  </div>
</div>
去你的CSS文件添加下面的代碼,
#paragraphs span
{
	font-family:"Myriad pro", Helvetica, sans-serif;
	font-size:22px;
	font-weight:600;
	letter-spacing:-2px;
}
#paragraphs
{
	margin-left:80px;
	font-family:Arial, Helvetica, sans-serif;
	color:#191919;
	font-size:12px;
	margin-top:15px;
}
.paragraph
{
	width:250px;
	margin-left:15px;
	float:left;
}
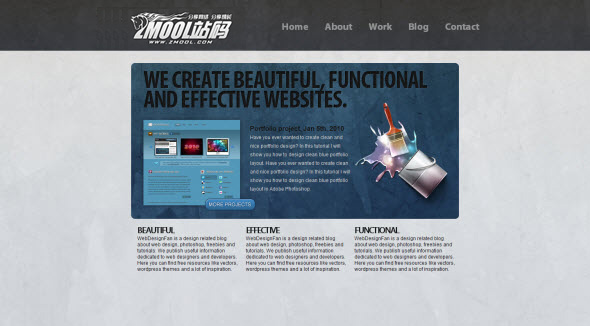
這個就是我們到目前位置的效果:
下面處理網站底部
現在,我們完成該部分內容,我們將開始創建頁腳.
首先,在你的PSD文件中,隱藏除頁腳和頁腳紋理層外的其他層,然后把頁腳文件夾的東西切片并保存為footer.jpg.
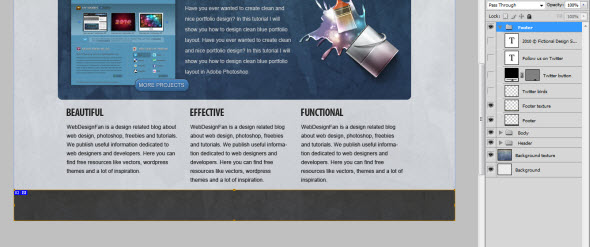
然后再切一遍,把按鈕和鳥的圖形切下來.分別取名為follow.png和 bird.jpg.
編輯底部代碼
底部頁腳包括一些文字和一個帶有鏈接的小鳥圖片.
所以在HTML頁面添加如下代碼.
現在, 編輯底部footer樣式的代碼,如下:
#footer
{
	background:url(images/footer.jpg);
	height:71px;
	margin-top:191px;
}
#footer p
{
	font-family:Arial, Helvetica, sans-serif;
	font-size:12px;
	color:#959595;
	position:absolute;
	margin-top:30px;
}
#footer a
{
	background:url(images/follow.png);
	text-indent:-9999px;
	position:absolute;
	height:27px;
	width:124px;
	margin-left:730px;
	margin-top:30px;
}
#footer img
{
	float:right;
	margin-top:10px;
}
我們用footer.jpg 做頁腳的背景,然后添加一些文字的樣式.
對于底部的鳥圖片的鏈接,我們用之前同樣的辦法,利用浮動效果定位。
最終效果

文件下載地址 (0,7 MB)
到現在就算是結束了,不知道大家有沒有看懂,不懂的就留言,什么地方不懂,我再添加修改下?
穩定
產品高可用性高并發貼心
項目群及時溝通專業
產品經理1v1支持快速
MVP模式小步快跑承諾
我們選擇聲譽堅持
10年專注高端品質開發